
Roll away chicken nesting box plans offer a practical solution for easy egg collection and cleaning. These designs feature an inclined floor that gently guides eggs to a collection tray, keeping them clean and preventing damage; Ideal for backyard chicken keepers, these plans often include detailed instructions and materials lists, making them accessible for DIY enthusiasts. With options for customization, roll away nesting boxes can be tailored to fit various coop sizes and flock needs, ensuring efficient egg management and happy hens.
1.1 What Are Roll Away Chicken Nesting Boxes?
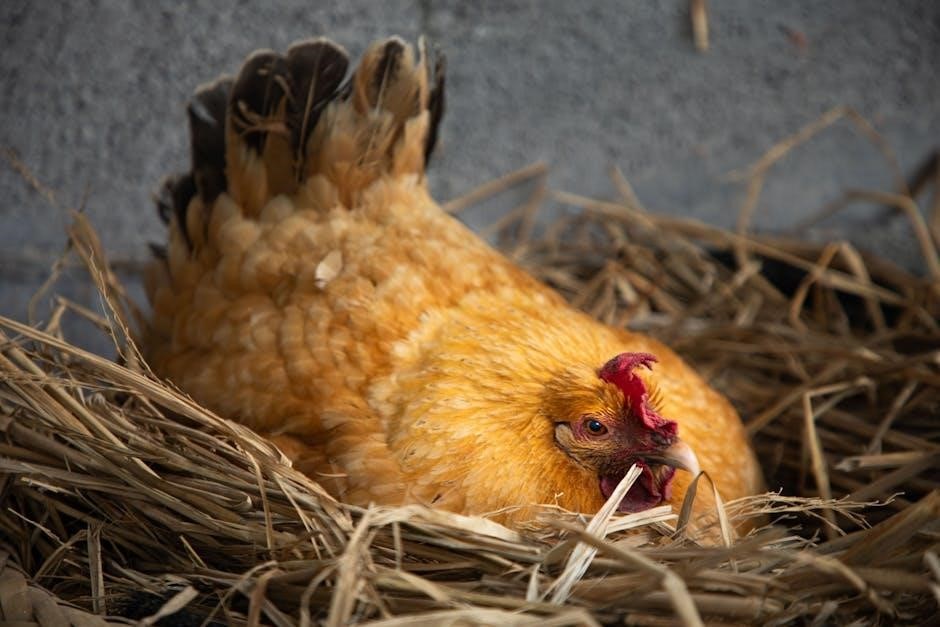
Roll away chicken nesting boxes are specialized enclosures designed to make egg collection easier and cleaner. They feature an inclined floor that allows eggs to glide into a collection tray, preventing hens from accessing or damaging them. These boxes are ideal for backyard chicken keepers, as they reduce egg-eating behavior and keep eggs clean. The design typically includes a sloped surface and a tray, ensuring eggs roll away safely. This innovative solution simplifies egg gathering and maintenance, making it a practical choice for both small and larger flocks, while also promoting a tidy and efficient nesting environment for hens.
1.2 Benefits of Roll Away Nesting Boxes
Roll away nesting boxes offer numerous benefits for chicken keepers. They simplify egg collection by allowing eggs to glide into a tray, reducing damage and soiling. This design prevents hens from accessing laid eggs, minimizing egg-eating behavior. The inclined floor ensures eggs roll away safely, keeping them clean and intact. Additionally, these boxes make cleaning easier, as eggs are contained and protected from dust and debris. They also promote a hygienic environment, reducing the risk of bacterial contamination. Overall, roll away nesting boxes enhance efficiency, protect eggs, and create a more organized system for managing your flock’s egg production.
1.3 Importance of Nesting Boxes for Egg Collection
Nesting boxes are essential for efficient and clean egg collection. They provide a dedicated space for hens to lay eggs, reducing the risk of eggs being scattered or damaged. Without nesting boxes, eggs may be laid in hard-to-reach areas, making collection time-consuming. Nesting boxes also protect eggs from dirt, bacteria, and predators, ensuring they remain clean and safe for consumption. By encouraging hens to lay in a specific location, nesting boxes streamline the egg-gathering process, making it easier to manage your flock’s productivity and maintain hygiene. This setup benefits both the keeper and the hens, promoting a tidy and organized egg collection system.
Materials Needed for Building a Roll Away Nesting Box
Plywood, 2×2 lumber, and hardware are essential materials. Plywood forms the structure, while 2×2 lumber provides support and dividers. Hardware like hinges and screws ensures durability and ease of assembly.
2.1 Plywood for the Nesting Box Structure
Plywood is the primary material for building the nesting box structure due to its durability and ease of use. A half-inch thick plywood is ideal for the box’s exterior, including the back, bottom, and nesting areas. It provides a sturdy surface for the hens to lay eggs and supports the weight of the structure. Plywood is also easy to cut and assemble, making it a practical choice for DIY projects. Ensure the plywood is free from harmful chemicals to keep the hens safe and the eggs clean. Properly sealed plywood additionally resists moisture, enhancing the box’s longevity.
2.2 2×2 Lumber for Supports and Dividers
2×2 lumber is essential for adding structural support and dividers within the nesting box. These pieces are used to frame the box, ensuring stability and preventing the plywood from bowing under weight. The 2x2s are ideal for creating individual nesting compartments, providing hens with private laying spaces. Additionally, they serve as supports for shelves and the inclined floor, ensuring the roll-away mechanism functions smoothly. By attaching the 2x2s to the plywood, you avoid drilling directly into the edges, which could weaken the structure. This setup enhances durability and keeps the nesting box organized and functional for years.
2.3 Hardware and Fasteners
Hardware and fasteners are crucial for assembling and securing the nesting box structure. Use 1.5” wood screws to attach the 2×2 lumber to the plywood, ensuring a sturdy frame. Smaller 1” screws are ideal for securing dividers and the egg door in place. Hinges are necessary for the egg door, allowing easy access for cleaning and egg collection. Latches or clips can be added to keep the door closed. Galvanized or weather-resistant hardware is recommended to prevent rust and ensure longevity. Properly securing all components with the right fasteners guarantees a durable and functional nesting box for your hens.
Step-by-Step Construction Guide
This guide provides clear instructions for building a roll away nesting box, from cutting plywood to assembling the cabinet, attaching the egg door, and installing the roll-out tray.
3.1 Cutting the Plywood for the Nesting Box
Begin by measuring and cutting the plywood according to your roll away nesting box plans. Cut two pieces for the sides, one for the back, and additional sections for shelves and the egg door. Use a circular saw for precise cuts, ensuring smooth edges. Sand all cut surfaces to prevent splinters. If using 2×2 lumber, cut supports and dividers to size. Label each piece for easy assembly later. Proper measurement and cutting are crucial for a sturdy and functional nesting box, so double-check your dimensions before proceeding.
3.2 Assembling the Nesting Box Cabinet
Begin assembling the nesting box cabinet by screwing the side panels and back piece together using 2×2 lumber for added stability. Attach the shelves and supports to create separate compartments for each hen. Ensure the shelves are evenly spaced and securely fastened to prevent bowing under weight. Use screws to attach the egg door frame, making sure it aligns properly for easy access. Double-check all joints for strength and durability. Sand any rough edges to ensure a smooth finish. Proper assembly ensures the nesting box is sturdy and functional, ready for the next steps in the construction process.
3.3 Attaching the Egg Door and Dividers
Attach the egg door by screwing its hinges to the front of the nesting box cabinet. Ensure the door aligns properly and can swing open smoothly for easy egg access. Secure the latches to keep the door in place when closed. Next, install the dividers between each nesting compartment using 2×2 lumber or plywood strips. These dividers help prevent hens from entering neighboring boxes and reduce competition. Make sure the dividers are evenly spaced and securely fastened. Finally, attach any additional hardware, such as handles or catches, to complete the assembly. Proper installation ensures the nesting box functions efficiently and remains durable over time.
Creating the Roll Away Mechanism
The roll away mechanism involves designing an inclined floor and attaching an egg collection tray. The slope directs eggs to the tray, ensuring safe and easy collection while keeping the nesting area clean and preventing egg damage. This feature is essential for efficient egg management and maintaining hygiene in the nesting box. Proper alignment and installation of the inclined floor and tray are crucial for the mechanism to function effectively, as outlined in the PDF plans.
4.1 Designing the Inclined Floor
Designing the inclined floor is crucial for the roll away nesting box. A gentle slope, typically between 9º and 17º, ensures eggs roll smoothly to the collection tray. Use plywood or similar materials, cutting it to fit the nesting box dimensions. Attach wooden slats or plastic strips along the floor to guide eggs effortlessly. The incline prevents hens from accessing the eggs, reducing damage or soiling. Proper alignment and installation are essential for functionality. Detailed measurements and diagrams in PDF plans help achieve the perfect slope, ensuring eggs roll away cleanly and efficiently for easy collection.
4.2 Installing the Egg Collection Tray
Installing the egg collection tray is a straightforward process that enhances efficiency. Cut a piece of plywood, metal, or plastic to fit under the inclined floor, ensuring it aligns with the nesting box. Secure the tray using hinges or brackets for easy removal. A slight lip on the front prevents eggs from rolling out. Attach a handle for convenient access. The tray collects eggs cleanly, reducing soiling and damage. Regular cleaning is essential to maintain hygiene. Detailed PDF plans provide precise measurements and visuals, making installation seamless. This feature is a game-changer for egg collection, keeping your flock’s eggs safe and organized.
Best Practices for Nesting Box Placement
Nesting boxes should be placed at a comfortable height for hens, ensuring easy access while minimizing stress. Position them away from high-traffic areas to encourage usage.
5.1 Location Within the Chicken Coop
Place roll away nesting boxes in a quiet, draft-free area of the coop to encourage hens to lay eggs comfortably. Position them away from high-traffic zones and roosting areas to minimize stress. Ideally, nest boxes should face the coop entrance for easy access and egg collection. Ensure they are at a comfortable height—typically 2-4 feet off the ground—to accommodate the hens’ natural nesting behavior. Avoid placing them near feeders or water sources to prevent contamination. A well-located nesting box promotes egg production and makes egg gathering convenient for you.
5.2 Height and Accessibility for Hens
Nesting boxes should be placed at a height of 2 to 4 feet off the ground for easy hen access; This range allows hens to comfortably step up without straining. Ensure the entrance is slightly lower than the nesting area to encourage use. The roll away mechanism should be designed so eggs gently slide into a collection tray, preventing breakage. Boxes must be sturdy and securely attached to the coop to avoid tipping. Proper height and accessibility promote egg production and make collection easier for keepers, ensuring a smooth experience for both hens and handlers.
Maintaining and Cleaning the Nesting Box
Regular cleaning is essential to prevent bacteria and odors. Remove soiled bedding, disinfect surfaces, and replace with fresh material. Ensure the roll-away tray is cleaned daily to protect eggs and hens.
6.1 Regular Cleaning Schedule
A regular cleaning schedule is crucial for maintaining a healthy and hygienic environment in your roll-away nesting box. Start by removing soiled bedding daily, replacing it with fresh, dry material like straw or wood shavings. Eggs should be collected regularly to prevent breakage and dirt accumulation. Once a week, disinfect all surfaces with a pet-safe cleaner to eliminate bacteria and odors. For deeper cleaning, remove all bedding and wash the nesting box thoroughly every month. Allow it to dry completely before adding fresh bedding. A clean nesting box ensures happier, healthier hens and fresher eggs for your family.
6.2 Tips for Preventing Egg Damage
To prevent egg damage, ensure the nesting box floor is smooth and even. Regularly inspect for sharp edges or splinters that could harm eggs. Soft bedding like straw or wood shavings cushions eggs as they roll into the collection tray. Keep the nesting area clean to avoid dirt accumulation. Train hens to exit the box after laying by placing treats outside. Avoid overcrowding, as too many hens can accidentally break eggs. Collect eggs frequently, especially in hot weather, to prevent cracking. A well-designed roll-away mechanism ensures eggs glide safely to the tray, reducing the risk of breakage and keeping them clean for collection.

DIY Plans and Tutorials
Discover detailed DIY plans and tutorials for building roll-away nesting boxes. YouTube videos offer step-by-step guidance, while free PDF plans provide precise measurements and materials lists.
7.1 Free PDF Plans for Roll Away Nesting Boxes
Free PDF plans for roll-away nesting boxes are widely available online, offering detailed designs and measurements for DIY enthusiasts. These plans often include a materials list, step-by-step instructions, and diagrams to ensure a smooth building process. Many PDFs are designed to be cost-effective, using minimal materials like plywood and 2×2 lumber. Some plans also incorporate additional features such as inclined floors and egg collection trays. Whether you’re a seasoned builder or a beginner, these PDF guides provide a comprehensive roadmap to creating functional and efficient roll-away nesting boxes tailored to your flock’s needs.
7.2 YouTube Tutorials for Visual Guidance
YouTube tutorials provide an excellent visual guide for building roll-away nesting boxes, making the process more accessible for DIY enthusiasts. Many videos offer step-by-step instructions, demonstrating how to cut plywood, assemble the cabinet, and install the roll-away mechanism. Tutorials often include tips for customizing the design and troubleshooting common issues. For example, one popular video shows how to build a roll-away nesting box using a single 4×8 sheet of plywood, while another highlights the importance of properinclined floors for egg collection. These videos are particularly helpful for beginners, ensuring a smooth and successful project completion.
Common Problems and Solutions
Common issues with roll-away nesting boxes include hens avoiding the boxes or eggs getting soiled. Solutions involve adjusting box placement, ensuring cleanliness, and proper incline design.
8.1 Hens Not Using the Nesting Box
Hens may avoid using nesting boxes due to improper placement, lack of privacy, or discomfort. Ensure boxes are at a comfortable height, well-ventilated, and free from drafts. Adding soft bedding like straw can encourage use. Placing boxes away from high-traffic areas and ensuring they are clean can also help. If hens still avoid the boxes, consider adjusting the design or adding visual barriers for privacy. Consistency in egg collection and minimizing disturbances near the nesting area can also encourage hens to use the boxes reliably. Proper maintenance and a stress-free environment are key to resolving this issue.
8.2 Eggs Getting Dirty or Broken
Eggs can become dirty or broken due to poor nesting box design, insufficient bedding, or hens’ behavior. To prevent this, ensure the roll-away mechanism has a smooth, gentle slope to guide eggs safely to the collection tray. Regular cleaning of the nesting area and tray is essential to keep eggs clean. Adding adequate soft bedding material, like straw or wood shavings, can cushion eggs and reduce breakage. Monitoring hens’ behavior and addressing any issues promptly can also help protect eggs. Proper maintenance and design adjustments can significantly reduce the risk of dirty or broken eggs, ensuring a clean and efficient egg collection process.
Tips for Customizing Your Nesting Box
Customize your nesting box by adding ventilation for better airflow, using soft bedding to cushion eggs, or incorporating predator-proof features to protect your flock and eggs.
9.1 Adding Ventilation
Adding ventilation to your roll away nesting box is crucial for maintaining a healthy environment for your hens. Proper airflow helps reduce moisture and odors, preventing the buildup of ammonia from droppings. Install small windows or vents to ensure fresh air circulates within the nesting box. This feature also helps regulate temperature, keeping the area cooler in summer and reducing condensation in winter. Additionally, ventilation can prevent mold growth, which is essential for the health of both the hens and the eggs. Consider adding screens or mesh to keep pests out while allowing air to flow freely.
9.2 Incorporating Predator-Proofing Features
Incorporating predator-proofing features into your roll away nesting box ensures the safety of your hens and their eggs. Use durable materials like metal or hardware cloth to reinforce the structure. Install secure latches on doors and consider adding locks to prevent predators from opening them. Cover vents and gaps with metal mesh to deter smaller predators like raccoons or snakes. Reinforce the nesting box floor and walls to withstand chewing or clawing. By integrating these features, you create a secure environment that protects your flock from potential threats while maintaining the functionality of the roll away design.
Roll away chicken nesting boxes are a practical and efficient solution for egg collection and cleaning. They offer convenience, keep eggs clean, and ensure happy, healthy hens.
10.1 Final Thoughts on Roll Away Nesting Boxes
Roll away nesting boxes are a game-changer for backyard chicken keepers, offering convenience, cleanliness, and efficiency. Their unique design ensures eggs are collected effortlessly, reducing waste and damage. With DIY-friendly plans, including free PDF guides, these boxes are accessible to all skill levels. Customizable designs allow for tailored solutions, while their durability and ease of maintenance make them a long-term investment. By preventing egg damage and encouraging natural nesting behavior, roll away boxes promote healthier hens and higher egg production. They’re a practical and rewarding addition to any chicken-keeping setup, making egg collection a breeze for years to come.
10.2 Encouragement to Start Your DIY Project
Embarking on a DIY roll away nesting box project is a rewarding and achievable endeavor, even for beginners. With clear plans and basic tools, you can create a functional and efficient system for egg collection. The satisfaction of building something with your own hands, knowing it benefits your flock, is incredibly fulfilling. Don’t hesitate to dive in—these plans are designed to be accessible and user-friendly. By starting your project, you’ll not only save money but also gain a sense of accomplishment. Gather your materials, follow the guide, and enjoy the joy of seeing your hens thrive in their new nesting box!